Upmarket is less than two weeks away and with the weather changing I thought I would make some hats for children and some for adults.


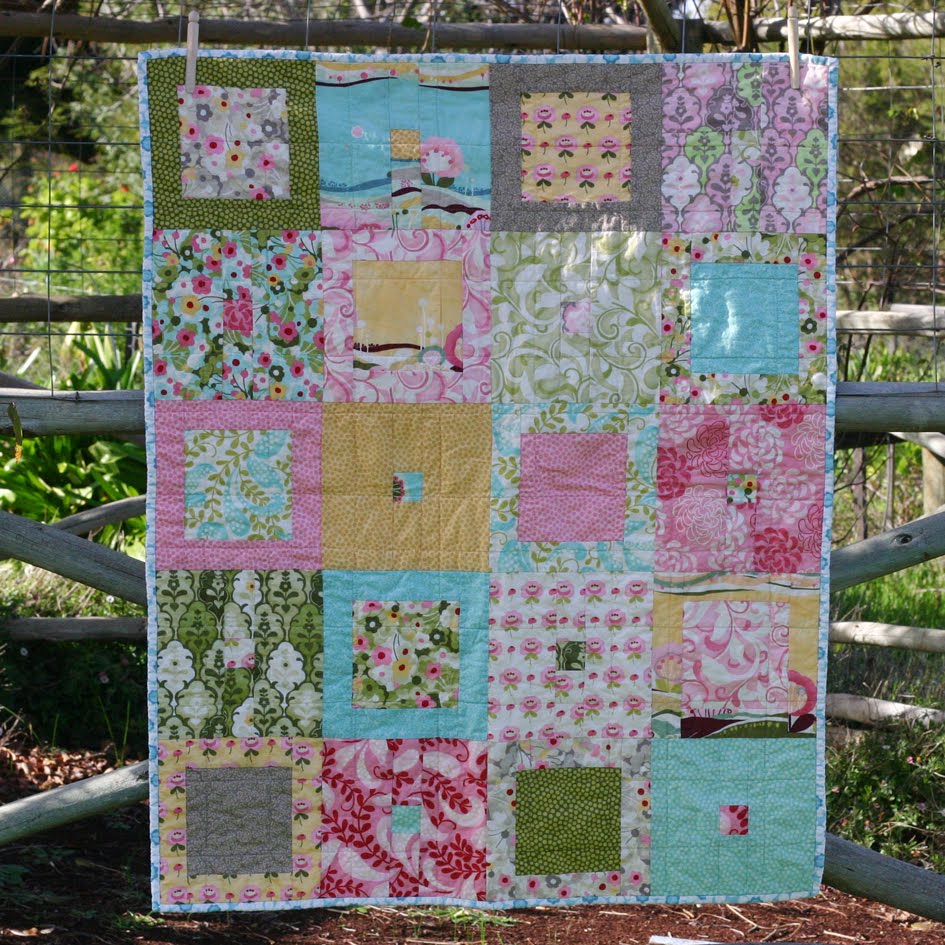
 2. Cut each fat quarter as shown in the diagram below below.
 3. Put the 14 1/2 x 2 1/2 rectangles away for the moment and organise the rest into 6 piles. Each pile will need one 10 1/2 square, one rectangle 10 1/2 x 5 1/2 and two rectangles 5 1/2 x 6 1/2. Make sure you use 4 different fabrics in each block.
 4. Take one pile of fabrics and sew the smaller rectangles together along the longer edge. Press (you can either press the seams open or to one side).
 5. Sew the big rectangle to the top and the square to the bottom. Press. Repeat for the other 5 blocks.
 6. Arrange the 5 blocks into 3 columns. The blocks in the middle row are upside down. When you are happy with the arrangement sew each column together.
 7. Take the 6 rectangles 14 1/2 x 2 1/2 you put aside at the start and sew together in 2 strips of 3 as follows.
 8. Sew the two strips between the columns.
 10. I quilted in horizontal and vertical straight lines, between about 2 and 5 inches apart.
 11. Trim away the excess batting and backing (leaving a little bit showing). From the excess backing fabric cut four strips along the width of the fabric 2 1/2 inches wide. Remove the selvedges and sew the strips together. Press in half wrong sides together down the length. Sew the binding to the front of the quilt, mitring the corners. Fold the binding to the back and stitch in place.
 Evie's thought process before she goes outside:
 Some bargains I found in Spotlight the other day, all were between $4 and $8 a metre. Perfect for some summer skirts and dresses for the girls.
 I saw this recipe yesterday from Mel and Evie and I whipped up a batch this morning. So easy and so delicious.
 I think this is my favourite Chocolate Chip Cookie recipe.
 Chocolate Chip Cookies
 Simplicity 3775 #3 - This time in grey. I cut the the band in half and did not do the ruching and just added some length to make up for sortening the band. I really should have tried it on while I was making it and made a few more adjustments, but it fits and is extremely comfortable.
 Evie has been having nice day sleeps the past week and I have been power sewing. Trying to get ready for markets, sew for presents and for new babies. I am trying to get a good amount of toys sewn so I don't end up in a big panic like I usually do the week before a market.


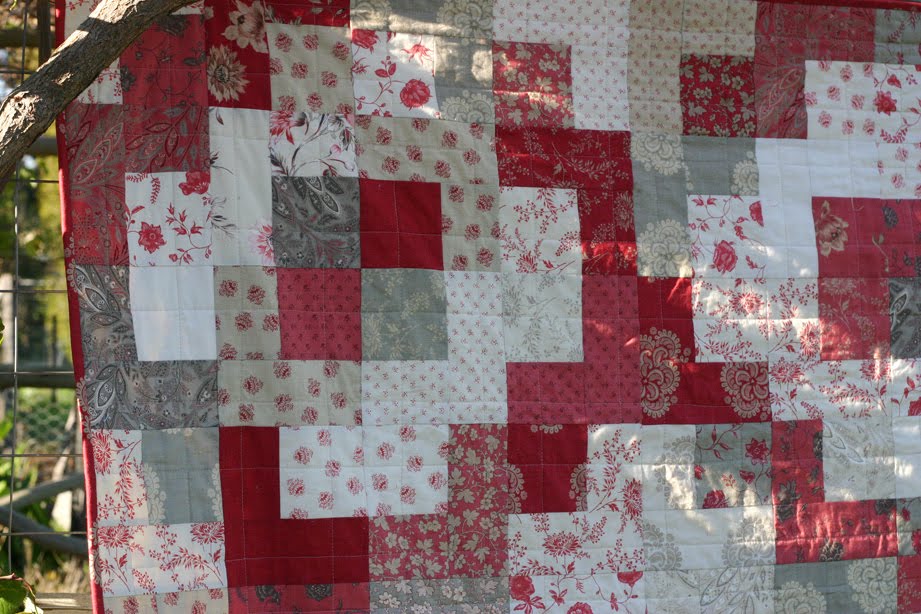
 I used a grey and white spot for the back, but I did not have quite enough so I added strips of 3 different fabrics to half of the back.
 I first made this pattern for my Mum, but hadn't shown it on my blog as I wanted to surprise her. I used fat quarters of French General Rouenneries. She loves it. I knew she would - this fabric seems like it was made just for her. I love it too - I really love the shades of red - and I would have loved to keep it for myself.
 I haven't found much time for dyeing recently, but I will put the little bit I have managed in the shop today.


 Good Mail - I won a giveaway from the lovely Suse - one of her waterproof pouch kits.
  Red shoes - I found these at Target last week and could not resist even though they are not leather (so if you see me wearing them in summer don't come to close).

 Machine quilting - lots of straight line quilting and still lots more to do.

 The only sensible picture I managed to take was of the back.
 Love the red flower buttons
 They came from a big pack of buttons I bought at Spotlight. Not the best quality, but they are great for children's clothes. They are also excellent for children to sort, group, pair, learn colours etc. A pack of buttons can keep a child very happy while I am sewing them some clothes.